Hair dryers have become an essential tool in our daily grooming routine, allowing us to style our hair quickly and efficiently. However, like any appliance, proper installation and regular maintenance are key to ensuring that your hair dryer performs optimally and has a long lifespan. In this comprehensive guide, we’ll walk you through the detailed steps of installing your hair dryer safely and effectively, as well as maintaining it to avoid common issues such as overheating, reduced airflow, and wear and tear.
Why Installation Matters
Proper installation of your hair dryer can prevent a range of issues, from electrical hazards to underperformance. Whether you’re installing a wall-mounted unit or a handheld dryer, understanding the installation process is crucial for both safety and efficiency.
1. Choosing the Right Location
Electrical Safety: Ensure that the location is near a GFCI (Ground Fault Circuit Interrupter) outlet to prevent electrical hazards, especially in bathrooms where water exposure is common.
Ease of Use: Choose a location that is easily accessible and convenient for daily use. For wall-mounted units, the height should be comfortable for all users in the household.
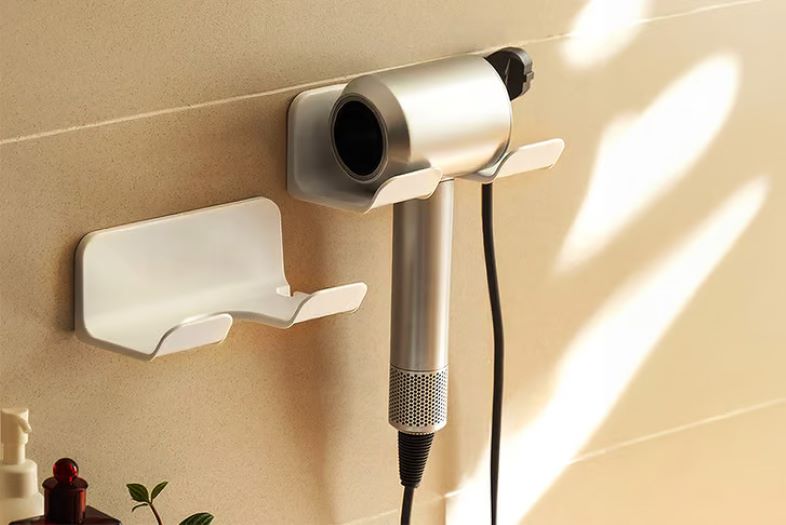
2. Installing a Wall-Mounted Hair Dryer
Step 1: Gather Tools and Materials
Screwdriver
Drill with appropriate drill bits
Level
Mounting hardware (usually included with the dryer)
Wall anchors if mounting on drywall
Step 2: Mark the Mounting Points
Use a level to ensure that the mounting bracket is perfectly horizontal. Mark the screw holes with a pencil.
Step 3: Drill Holes
Drill pilot holes at the marked points. If you’re drilling into drywall, use wall anchors for added stability.
Step 4: Attach the Mounting Bracket
Secure the bracket to the wall using screws. Double-check with a level to ensure it’s aligned correctly.
Step 5: Mount the Hair Dryer
Attach the hair dryer to the bracket as per the manufacturer’s instructions. Ensure it is securely fastened to prevent it from falling.
3. Installing a Handheld Hair Dryer
While handheld hair dryers don’t require complex installation, proper storage is key to maintaining their longevity.
Step 1: Choose a Storage Spot
Ensure the storage spot is dry and away from any water sources. This prevents moisture from entering the device and causing damage.
Step 2: Use a Heat-Resistant Mat
If you often leave your dryer on the counter, use a heat-resistant mat to protect surfaces from heat damage.
Step 3: Keep Cords Untangled
Avoid wrapping the cord around the dryer as this can lead to internal wire breakage. Instead, loosely coil the cord or use a cord organizer.
The Importance of Regular Maintenance
Regular maintenance of your hair dryer not only extends its lifespan but also ensures it operates at peak efficiency. Neglecting maintenance can lead to reduced performance, overheating, and even potential safety hazards.
1. Cleaning the Filter

One of the most common issues with hair dryers is a clogged filter, which can significantly reduce airflow and cause the dryer to overheat.
Step 1: Locate the Filter
The filter is usually located at the back of the dryer. Check your user manual if you’re unsure.
Step 2: Remove the Filter Cover
Gently twist or pull off the filter cover, depending on the model.
Step 3: Clean the Filter
Use a small brush or a soft cloth to remove dust and lint from the filter. If the filter is removable, you can wash it with warm, soapy water. Ensure it’s completely dry before reinstalling it.
Step 4: Reattach the Filter Cover
Once the filter is clean and dry, reattach the cover securely.
2. Inspecting the Power Cord
A damaged power cord is a serious safety hazard. Regularly inspect your hair dryer’s cord for signs of wear and tear.
Step 1: Visually Inspect the Cord
Look for any cuts, fraying, or exposed wires. Pay special attention to areas near the plug and where the cord meets the dryer.
Step 2: Test the Cord
Plug the dryer in and turn it on while gently bending the cord in various places. If the dryer cuts out or sparks, discontinue use immediately and replace the cord.
Step 3: Replacing the Cord
If you notice damage, it’s best to replace the cord or have a professional do it. Do not attempt to repair the cord with tape or other temporary fixes.
3. Preventing Overheating

Overheating can cause significant damage to your hair dryer and pose a fire risk. Here are some tips to prevent your dryer from overheating:
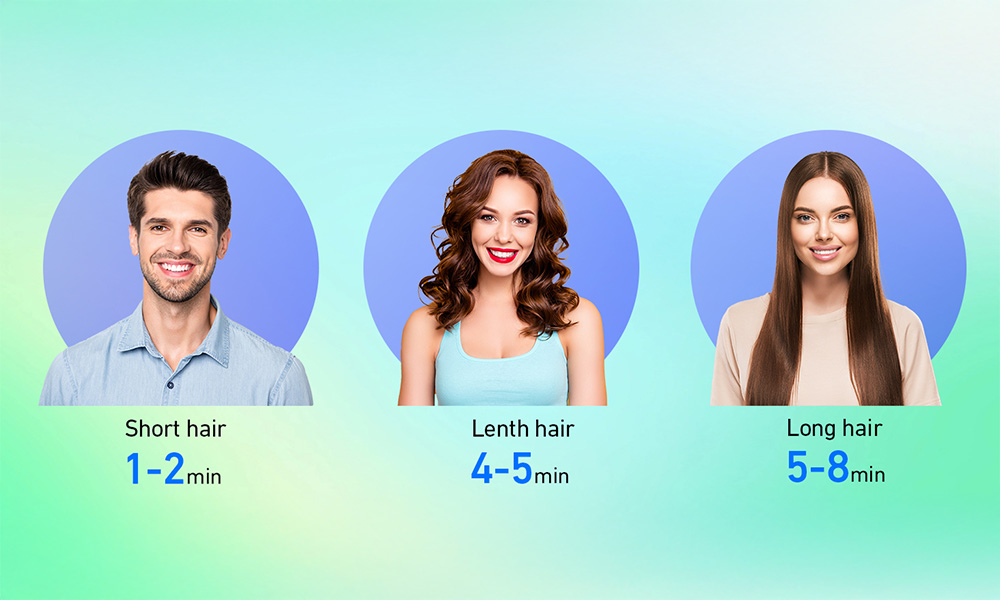
Step 1: Avoid Prolonged Use
Continuous use for more than 10-15 minutes can cause the dryer to overheat. Allow it to cool down between uses.
Step 2: Use Appropriate Settings
Use lower heat settings when possible, especially for fine or damaged hair. This reduces the strain on the dryer and prevents overheating.
Step 3: Check Airflow
Ensure that the air intake is not blocked by hair or lint. Regularly clean the intake vents to maintain optimal airflow.
4. Storing Your Hair Dryer
Proper storage can prevent damage and extend the life of your hair dryer.
Step 1: Unplug After Use
Always unplug your hair dryer after use to prevent any electrical issues.
Step 2: Store in a Cool, Dry Place
Store your dryer in a place that is free from moisture and extreme temperatures. Avoid storing it in a bathroom if possible.
Step 3: Use Protective Covers
Consider using a protective cover for your dryer when not in use, especially if you travel frequently.
Common Hair Dryer Issues and How to Fix Them
Even with regular maintenance, hair dryers can develop issues over time. Understanding common problems and how to address them can save you time and money.
1. Reduced Airflow
If your hair dryer isn’t blowing as strongly as it used to, it might be due to a clogged filter or blocked air vents.
Solution:
Clean the filter and air vents as described earlier. Ensure that no debris is blocking the airflow. If the problem persists, the motor may be wearing out, and it might be time to consider a replacement.
2. Overheating and Shutting Off
A hair dryer that frequently overheats and shuts off can be frustrating. This is often caused by a dirty filter or overuse.
Solution:
Clean the filter and allow the dryer to cool down before using it again. If the problem continues, check if the dryer is being used in a very humid environment, which can contribute to overheating.
3. Strange Noises
Unusual noises, such as rattling or buzzing, may indicate a problem with the motor or a loose internal component.
Solution:
Stop using the dryer and inspect it for loose parts. If you’re unable to identify the source of the noise, consider having it inspected by a professional.
4. Burning Smell
A burning smell is a serious issue that should not be ignored. It could indicate an electrical problem or that the dryer is overheating.
Solution:
Immediately unplug the dryer and inspect it for signs of damage. If the cord or plug appears damaged, discontinue use and replace it. If the smell persists, the internal wiring may be faulty, and the dryer should be replaced.
Understanding Hair Dryer Safety Standards
Hair dryers are subject to rigorous safety standards to prevent accidents. Understanding these standards can help you make informed choices when purchasing and using a hair dryer.
1. Electrical Safety
UL Certification: Ensure that your hair dryer has a UL (Underwriters Laboratories) certification. This indicates that the dryer has been tested for safety and meets the required standards.
GFCI Outlets: As mentioned earlier, using a GFCI outlet in bathrooms is essential for preventing electrical shocks.
2. Heat Settings and Thermostats
Modern hair dryers come with multiple heat settings and built-in thermostats to prevent overheating.
Thermostat: The thermostat controls the temperature of the dryer and prevents it from exceeding safe levels.
Thermal Fuse: Many dryers have a thermal fuse that cuts off power if the dryer gets too hot, preventing potential fires.
3. Cool Shot Button
The cool shot button is not just for styling; it also helps cool down the hair dryer after use, preventing heat buildup.
Use: After using the dryer on a hot setting, press the cool shot button for a few seconds to cool down the internal components.
Extending the Life of Your Hair Dryer
With proper care and attention, your hair dryer can last for many years. Here are some additional tips to extend its lifespan:
1. Regularly Inspect for Wear and Tear
Check the Power Cord: Regularly inspect the power cord for any signs of damage. Replace it immediately if you notice fraying or exposed wires.
Examine the Housing: Look for cracks or other damage to the dryer’s housing. While minor scratches are common, cracks can indicate internal damage.
2. Keep It Clean
Avoid Build-Up: Clean the dryer’s exterior regularly to avoid dust and product build-up, which can affect its performance.
Clean the Filter: As previously mentioned, regularly cleaning the filter is one of the most effective ways to maintain your dryer.
3. Use the Correct Settings
Heat Settings: Always use the appropriate heat setting for your hair type. Using high heat on fine or damaged hair can cause the dryer to overheat and damage your hair.
Cool Down: After using high heat, use the cool shot button to cool down the dryer before turning it off. This helps to reduce the wear on internal components.
When to Replace Your Hair Dryer
Even with the best maintenance, there comes a time when every hair dryer needs to be replaced. Knowing the signs that your dryer is reaching the end of its life can help you avoid using a faulty appliance.
1. Frequent Overheating
If your hair dryer is constantly overheating, even after cleaning and maintenance, it may be time to replace it. Continuous overheating can indicate that the internal components are wearing out.
2. Reduced Performance
A significant decrease in airflow or heat output is another sign that your hair dryer may need to be replaced. This could be due to an aging motor or other internal components failing.
3. Visible Damage
If you notice visible damage, such as cracks in the housing, frayed cords, or broken parts, it’s time to consider a new dryer. Using a damaged dryer can be unsafe and lead to further issues.
4. Strange Smells or Noises
As mentioned earlier, unusual smells or noises are often indicators of internal problems. If these issues persist, replacing the dryer is safer than attempting repairs.
Conclusion
Installing and maintaining your hair dryer correctly can make a significant difference in its performance and longevity. By following the detailed tips and guidelines provided in this guide, you can ensure that your hair dryer remains in top condition, providing you with efficient and safe hair styling for years to come. Regular maintenance, coupled with an understanding of when to replace your dryer, will help you avoid common issues and extend the life of your appliance.
Remember, safety should always be your top priority when using any electrical appliance. With the right care and attention, your hair dryer can be a reliable tool in your grooming routine for many years.
Ultimate Guide to Using a Hair Dryer with Nozzle for Styling
Discover the benefits of using a hair dryer with nozzle for faster drying, frizz reduction, and salon-quality styling at home.
Read More
The Benefits of Using a Hair Dryer with a Diffuser
Discover how a diffuser hair dryer reduces frizz, protects hair, defines curls, and adds volume for healthier, natural styling.
Read More
Ultimate Hair Dryer Guide for Every Life Scenario
Find the perfect hair dryer for travel, gym, salon, or home. Maxodo offers fast-dry, quiet, and versatile all-in-one solutions.
Read More